Rollerblock Series 1 and
Series 2 "Double Stack" Set UpHere's a typical setup of Double Stack Series 2 or Series 1 Rollerblocks. The procedure for single Rollerblocks is similar; just ignore the double stacking (and perhaps the use of the empty box as a spacer during setup) if you're installing a single set. These are just guidelines to give you an idea of one method of setup: please watch for future additions to this section which will include other methods, such as the Inverted Cup setup as described by Steven R. Rochlin on EnjoyTheMusic.com. If you have any suggestions for setup, we will be more than happy to hear them; please email them to us.

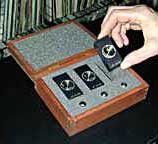
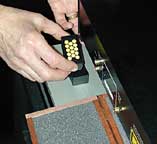
 1) When you first open the box, be careful NOT to touch the polished areas of the Series 2 Rollerblocks. This will preserve their precision polish. 1) When you first open the box, be careful NOT to touch the polished areas of the Series 2 Rollerblocks. This will preserve their precision polish. |
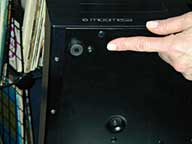 2) Examine the bottom of the component. Be aware of screw heads, built-in feet, and other protrusions, as well as cavities in the chassis. 2) Examine the bottom of the component. Be aware of screw heads, built-in feet, and other protrusions, as well as cavities in the chassis. |
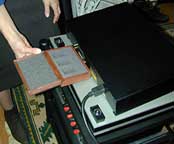
 3) After you have examined the bottom of the chassis, remove Rollerblocks from the box. 3) After you have examined the bottom of the chassis, remove Rollerblocks from the box. |
 4) Begin placing Series 2 bodies near to where they will sit beneath your component. 4) Begin placing Series 2 bodies near to where they will sit beneath your component. |
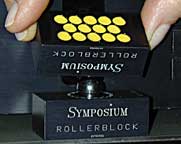
 5) Place the "blocks" close to where they will go under the component without the balls in them. 5) Place the "blocks" close to where they will go under the component without the balls in them. |
 6) Next, put a ball in each cup. Note that Series 2+ Rollerblocks are now supplied witih Tungsten Carbide balls. 6) Next, put a ball in each cup. Note that Series 2+ Rollerblocks are now supplied witih Tungsten Carbide balls. |
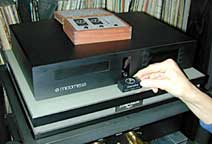
 7) In this example, we use two Series 2 bodies at the rear of the CD player, and one in the center at the front - but your component may have a different weight balance. 7) In this example, we use two Series 2 bodies at the rear of the CD player, and one in the center at the front - but your component may have a different weight balance. |
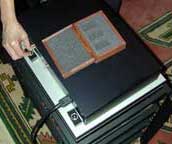
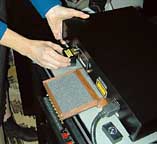
 8) You can use the empty Rollerblock box as a temporary "shim" or supporting spacer to aid in the Double Stack setup. 8) You can use the empty Rollerblock box as a temporary "shim" or supporting spacer to aid in the Double Stack setup. |
 9) Carefully lift one side of the component with your free hand, and slide the empty box underneath. You can use any flat, wide object that is a little less high than the Double Stack (1" - 1.5" is ideal). 9) Carefully lift one side of the component with your free hand, and slide the empty box underneath. You can use any flat, wide object that is a little less high than the Double Stack (1" - 1.5" is ideal). |
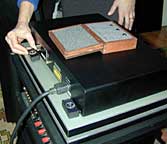
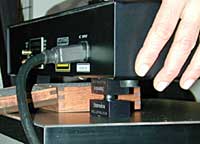
 10) To make a Double Stack, take another Series 2 body and invert it over the first one, with a ball in between. 10) To make a Double Stack, take another Series 2 body and invert it over the first one, with a ball in between. |
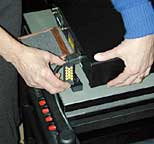
 11) Lift one corner of the component. The box that was placed underneath the component should provide the proper clearance height, and makes installation easier. 11) Lift one corner of the component. The box that was placed underneath the component should provide the proper clearance height, and makes installation easier. |
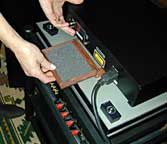
 12) Holding both Series 2 bodies with the ball between, slide the assembly into place. 12) Holding both Series 2 bodies with the ball between, slide the assembly into place. |
 13) Once the first corner is done, install the next Double Stack on the opposite corner on the same side. 13) Once the first corner is done, install the next Double Stack on the opposite corner on the same side. |
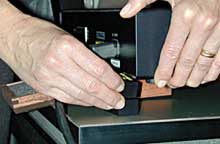 14) Again, carefully lift the corner, and slide the Double Stack into place. 14) Again, carefully lift the corner, and slide the Double Stack into place. |
 15) Carefully let the corner down. As with the first Double Stack, make sure that it lies FLAT against the chassis. 15) Carefully let the corner down. As with the first Double Stack, make sure that it lies FLAT against the chassis. |
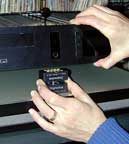 16) Finish at the front position. Be sure to HOLD your component firmly while you do this last one. Afterwards, your component should be suspended on only the Rollerblocks! 16) Finish at the front position. Be sure to HOLD your component firmly while you do this last one. Afterwards, your component should be suspended on only the Rollerblocks! |
 17) The box should now be clear of the component. Remove it carefully. 17) The box should now be clear of the component. Remove it carefully. |
 18) Look to be sure that all of the Double Stacks are flat against the chassis underside, without screws, feet, or other protrusions caught between or blocking movement. |
 19) Attached wires should NOT be resting too closely against walls, rack, floor or shelf. This will prevent best performance! Click image or here for larger picture. 19) Attached wires should NOT be resting too closely against walls, rack, floor or shelf. This will prevent best performance! Click image or here for larger picture. |
 20) This is correct. Make sure that the AC cord and interconnects hang free for as long as possible, without touching walls, rack levels, or other components. Click image or here for larger picture. |

Click image for larger picture
The finished installation.
Watch for more installation and setup tips, coming soon.

Home Rollerblocks Products